I've had an idea for a while now to breathe some new life into my kitchen cabinets, but I kept pushing it to the back of my mind because I didn't know if it was a good idea or not. It had the potential to be fabulous, but it seemed almost equally likely to be completely hideous. I had almost all the supplies on hand so it wouldn't cost more than about $10, but if I hated it . . . the cabinets would be ruined and there was no going back. I had recently painted all my cabinets with chalk paint so I kept telling myself to leave well enough alone. The cabinets were fine.
But what if my idea was a good one . . .
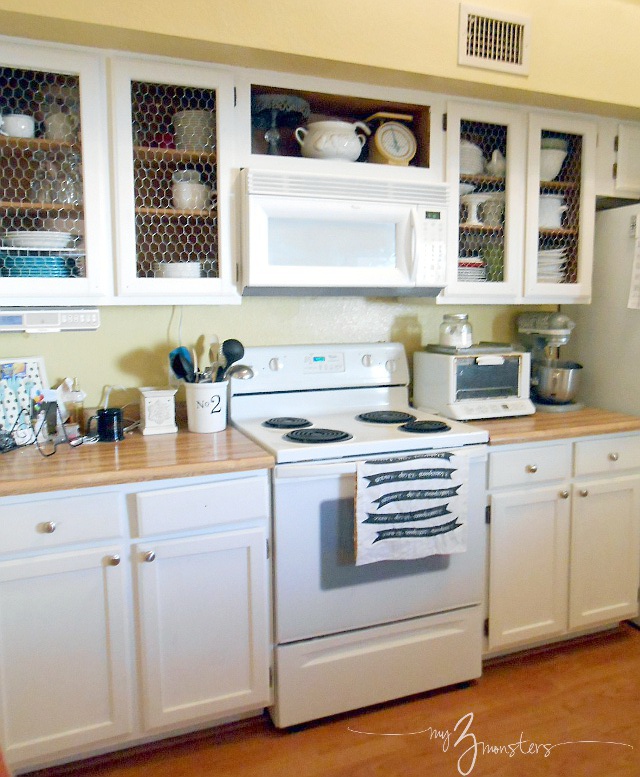
I couldn't let it go so last weekend I finally took the plunge. I decided to remove the inset panels of my upper cabinets and replace them with chicken wire. Here is what my kitchen looked like before:
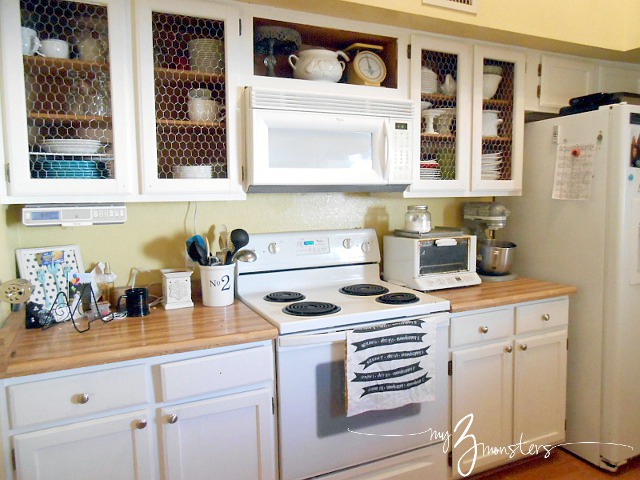
And here's what it looks like today:
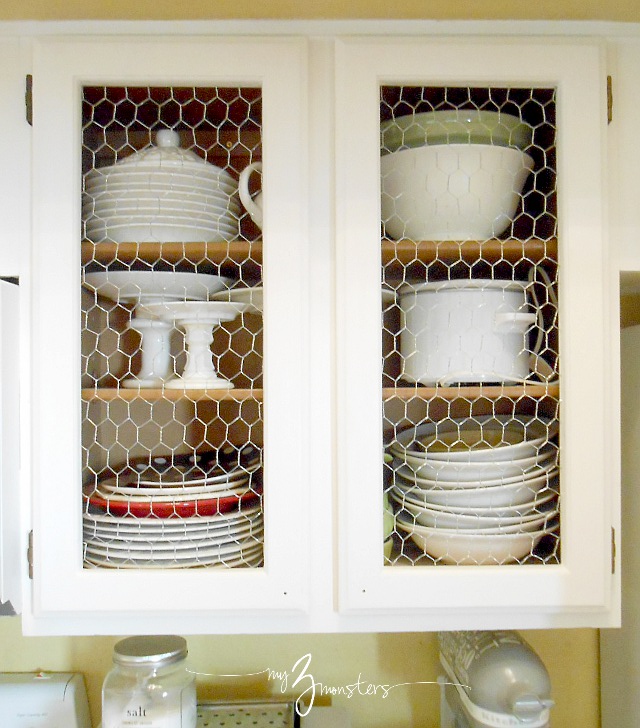
I LOVE them so much!! Of course they're not finished. I still need to paint the inside of the cabinets white, caulk and paint the trim, put the hardware back on, and arrange the dishes neatly now that they show. It has been a pretty easy {though time-consuming} project. Here's the run-down:
1. The first challenge was removing the recessed panels of the doors. This was one of many times that I wished we lived closer to our families. I would have just run over to my parents' house and had my dad router them out. {Rout them out? Use his router to remove them. That's what I mean.} But Houston is a long way to go for a project like this so we did the next best thing and gave our 75-year-old carpenter friend Bob a call. He was more than happy to help even though I'm convinced he thinks I'm half-crazy for "ruining" perfectly good cabinet doors like this. He asked us several times if we were absolutely sure this is what we wanted before he started cutting. His lack of confidence didn't do much to bolster mine, but we plowed ahead.
I should have taken pictures of this process, but we were too busy listening to Bob's stories. He's a fun guy to talk to and he was telling us about how he recently almost cut off three of his fingers with a chain saw. Good stuff. Basically, he drilled a hole in each corner of the panel with a forstner bit {the kind that makes a bigger hole than a regular drill bit} then ran his router along each edge to cut the panel out. It takes a pretty steady hand to remove the panel without gouging the existing molding. I'm so glad Bob was doing it and not me. Finally he chiseled out the little bits of wood left in the corners to square them out and sanded everything smooth.
2. We brought the doors home and I gave them a fresh coat of chalk paint to cover up the raw edges where we cut the panel out and cover all the scratches that occurred in the shop. Then it was the moment of truth -- adding the chicken wire. I cut the chicken wire to size using wire cutters and stapled it in place with a staple gun. At this point I was feeling pretty good about my decision to go ahead with this project. Things were looking preeeeety sweeeeeet.
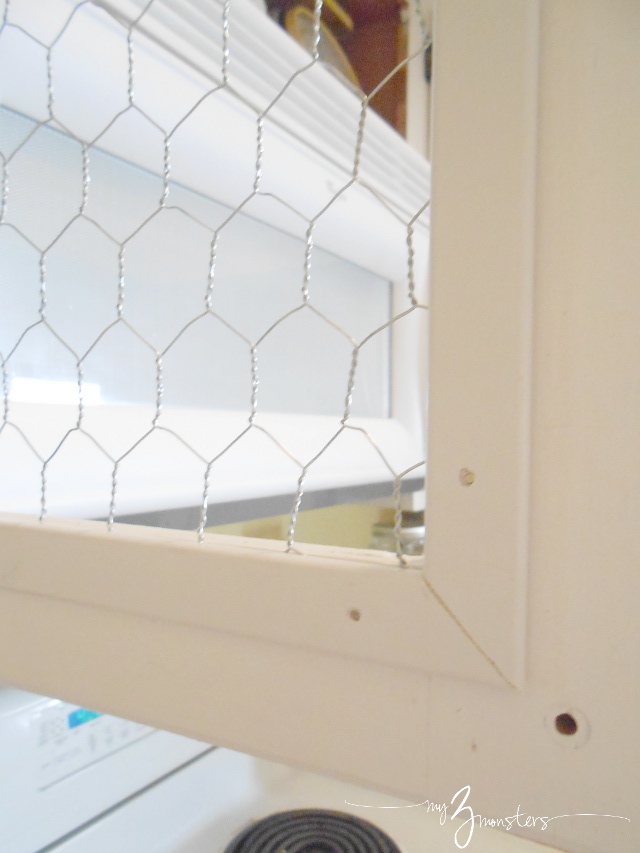
3. The next challenge was covering the rough edges on the back side of the cabinet doors so they looked finished. At Lowe's we found some 6-foot-long pieces of screen molding for about $2 each. Screen molding is about 1/2 inch wide flat molding that worked perfectly to nail in on the back side of the doors to cover up all the cut edges of the chicken wire. {We just used our hand saw and a $5 miter box to cut those mitered corners so don't be intimidated if you don't have big, fancy tools.}
This is the point we are at right now. I need to go and fill all the gaps and nail holes with wood filler and touch up the paint and then paint the inside of the cabinets white. I also need to weed through all my old dishes and organize everything. That might be the biggest job of all.
I'm super thrilled with the way it looks now! I have plans to eventually paint all those yellow walls white and paint the lower cabinets navy blue. That will come in time. I'd also like to put some subway tile on the back splash and change the counter tops, but that, too, will come later. One thing at a time.
I'm hoping to have Part 2 of this post done by next weekend to show you what it looks like with everything finished and painted. In fact, I'm excited to see what everything looks like all finished and painted myself. I'm always amazed by the big difference that you can make with a few bucks and a little bit of creativity. I'd love too hear about your favorite creative home projects. Leave a comment and give me some more great ideas!
You can now see the finished project in Post 2 HERE!
UPDATE: Come see what the kitchen looks like today after changing the color of the lower cabinets and countertops!!


I'm no expert on this stuff, but I really do think that looks cool. 10 points for Gregson!
ReplyDeleteThanks!
DeleteIt looks great!! You know what my favorite part is though? That you have a pile of random stuff on your counter top, lol. It is nice to know that I am not the only one that struggles with the countertop pile. Thanks for making my day!
ReplyDeleteHa! With 5 people in a 1400 square foot house, piles are sometimes unavoidable. Also, I don't really stage my photos. We are what we are around here. Thanks for the nice comment.
DeleteWOW! That totally opened up your kitchen. Who knew? Looks amazing! Nothing like a little change to lift the spirits :)
ReplyDeleteThanks. I can't wait for you to come home already!!!
DeleteLove this! If you get a chance, please share this on my linky party: http://suburbsmama.blogspot.com/2013/04/sunday-link-party-5.html
ReplyDeleteThanks. I'll check it out!
DeleteThis is awesome! I love it!
ReplyDeleteThank you so much!
DeleteYour kitchen looks beautiful! What an awesome idea! I have a new weekly link party which is live now and I would love if you stop by and link up this wonderful post! Hope to see you there! http://mariaelenasdecor.blogspot.com/ Hugs, Maria
ReplyDeleteThank you so much! I'll check your link party out now!
DeleteThe chicken wire looks so shabby chic! Fantastic job! :)
ReplyDeleteThanks!
DeleteWe used to have a restaurant in town that had some cabinets done like this and I loved it then and love it on your cabinets!
ReplyDeleteThat is awesome. Thanks so much for the nice comment!
Delete