My 3 Monsters: November 2013

Recent Posts

11.29.2013

FREE Holiday Printables!

Well, Thanksgiving is over and we're doing Christmas now, right? Time is flying so fast this year, I can't seem to keep up!  Did you guys go Black Friday shopping this morning?  I used to go every year when my kids were small.  Something about getting up in the cold, dark hours of the morning, chasing deals while my family was home sleeping was super exciting to me.  One year, the last time all my sisters and I were together for Thanksgiving, we pulled an all-nighter and hit a bunch of stores.  I don't think I've ever laughed so hard in my life.  Now that I have a high-schooler who takes a zero-hour seminary class and I have the privilege of getting up in the cold, dark morning hours every single day while the rest of the family sleeps away, Black Friday has lost some of its allure.  I prefer to be the one sleeping in and relaxing now.

Wow.  I just turned 40, but I may as well be 100.

In honor of the kick-off to Christmas today, I whipped up some Holiday Printables as a gift for all my online besties.


Free Holiday Printables at /
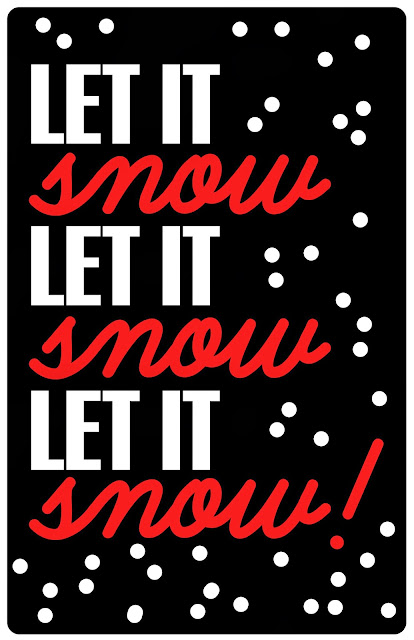
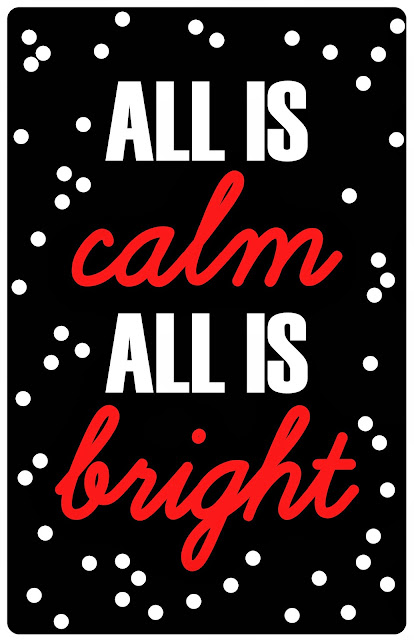
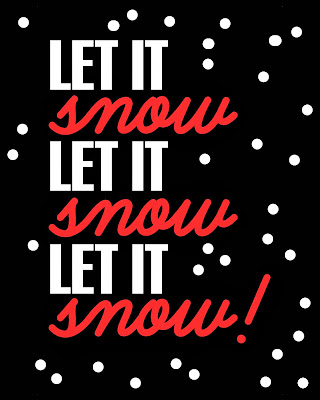
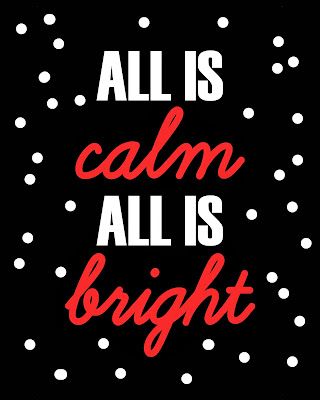
Remember the Interchangable Quote Boards that I made a while back?  I originally designed these printables to fit those, but I also scaled them down to fit in a normal sized frame, too.  They're cheery and bright and make me smile when I see them.  

If you would like to download and use these designs for your personal use:  

Simply hold the CTRL button down while clicking on any of the images below to open it in a new window.  In the new window, make sure it is full size by clicking on the image then right click and save it to your computer.  The odd size designs -- 11x17 -- can be printed by uploading the files to Staples Copy & Print Center website and choosing a full-color 11x17 cardstock print for less than $2.  The standard size files -- 8x10 -- can be printed at any photo processing center and framed.  {FYI:  the red looks NEON on the screen, but is really much more mellow when printed.  I'm not sure why that happened.  Sorry!}

Let it Snow 11x17
Free Holiday Printables at /

  All is Calm 11x17
Free Holiday Printables at /

Merry Little Christmas 11x17
Free Holiday Printables at /

Let it Snow 8x10
Free Holiday Printables at /

All is Calm 8x10
Free Holiday Printables at /

Merry Little Christmas 8x10
Free Holiday Printables at /

Whether you went out shopping today or stayed home to enjoy a little low-key family time, I hope this was an excellent start to your holiday season.  Thanks for taking the time out of your busy-ness to stop by here.  Hope your holidays are wonderful, my friends!

11.27.2013

Thanksgiving Oddities
{My Favorite Holiday Recipes!}

I can't believe tomorrow is Thanksgiving!  We'll be spending time with family and feasting ourselves silly, like most everyone else in the country.  All Thanksgiving meals are basically the same, aren't they?  Turkey. Some variation of stuffing.  Potatoes and gravy.  Rolls.  The usual.  But, every family has their signature dishes -- the ones that you have to have every year, just the way you make them, for the day to feel complete.  My family is no different.  As my kids and I were talking recently, I realized that some of our signature dishes are a little . . . odd sounding . . .  Don't get me wrong, they're delicious.  It's just that if you have never tasted them, you might not think you want to.  Today I am going to share some treasured family recipes with y'all.  Whether or not you are brave enough to give them a shot is entirely up to you . . .

Sage Stuffing recipe at /

We'll start out with a pretty standard dish so you don't think we're completely nuts -- my mom's Sage Stuffing.  Nothing unusual about it, I promise.  It's just my all-time favorite stuffing recipe.  I've had some that were similar, but none that I ever liked as well as this.  I remember waking up to the smell of sauteing onions every Thanksgiving growing up.  Mom was always up early getting the turkey started and I just knew it was going to be a great day. 

Sage Stuffing recipe at /

Mom's Sage Stuffing

1 loaf of bread, cubed
2 medium onions, diced
{I also add a couple stalks of chopped celery, too, but the "official" recipe doesn't call for it}
1 stick butter
2 eggs, beaten
1 tsp. pepper
2 Tbsp. salt
2 -1/2 tsp. ground sage

Melt butter in a small saucepan.  Add onions {and celery, if desired} and saute until soft.  
Put cubed bread in a large bowl.  {Here's a weird little tip I discovered by accident:  a couple packs of stale hot dog or hamburger buns make the yummiest stuffing in the world.  I don't know why.  Maybe because they're more dense?  I just like them better.} 
Pour butter and onions on top.  Add seasonings and eggs.  Stir gently until bread is moistened.   If the mixture seems too dry, add warm water 1 Tbsp. at a time until moistened. 
Stuff inside turkey cavity and bake at 350 degrees for approximately 20 minutes per pound of turkey.
 __________________________________________

Next,  a favorite appetizer.  When my family gets together for Thanksgiving, here's how the day goes:  our kids, the cousins, all hang out together, laughing and playing games; the women all help out in the kitchen; and the men watch football.  It's a pretty good system, actually.  No one is complaining.  We LOVE eating Shrimp Chip Dip while we work . . . and watch football.  Seriously, a bag of Wavy Lays potato chips and a bowl of Shrimp Dip are just as important as the turkey and potatoes in my mind.

Creamy Shrimp Chip Dip recipe at /
This dip is light and creamy and unlike any other chip dip I have ever had.  

Shrimp Chip Dip

1 (8 oz.) pkg. cream cheese, softened
1 pint whipping cream
1 can of tiny shrimp {deveined}
2 Tbsp. grated onion
garlic salt to taste


Drain and rinse shrimp, but keep them in the can they came in.  Fill the can with fresh water and a few ice cubes to get the shrimp nice and cold.

While the shrimp chills, pour the cream into a mixing bowl, reserving about 1/3 C. to blend with the cream cheese.  Whip the cream.  In another bowl, blend the cream cheese and reserved cream.  Add onion and garlic salt.  Fold in whipped cream and shrimp.  Serve with potato chips or crackers.

Keep leftovers {if you have any!} refrigerated.

Creamy Shrimp Chip Dip recipe at /
This dip is especially good if you make it at least an hour in advance so all the flavors have a chance to blend before eating.

____________________________________________

Finally, I'm going to share one of our favorite Thanksgiving desserts.  I know this one sounds awful, and may have a very limited fan base due to one of the main ingredients, but it is extremely tasty.  Are you ready?  Sour Cream Raisin Pie.  No, I'm not kidding.  It has spices similar to pumpkin pie, but it is completely different and so, so good!

Sour Cream Raisin Pie recipe at /

Sour Cream Raisin Pie

1 9-inch baked pie shell
1/2 C. raisins
1 1/2 C. water
2 egg yolks, beaten
1 C. sugar
1/2 tsp. cinnamon
1/4 tsp. cloves
1/4 tsp. salt
3 Tbsp. cornstarch
1 C. sour cream

Boil raisins in water for 5 minutes, until they become plump and soft.

Mix all other ingredients, except for sour cream.  Stir into raisin mixture and boil until thick, stirring constantly.  

Cool slightly before stirring in sour cream and pouring into baked pie shell.  Cool in the refrigerator for several hours and serve with whipped cream.


Sour Cream Raisin Pie recipe at /

___________________________________________


There you have it!  Will you be eating anything tomorrow that others might think is a little strange?  Sometimes those things are the yummiest dishes on the table.  Have a very, very safe and happy Thanksgiving, friends!

11.26.2013

Random Crafts of Kindness

Thanks to ConsumerCrafts.com for sponsoring today's post!


I was really excited a few weeks ago when  I was asked to participate in this fun Random Crafts of Kindness project from ConsumerCrafts.com.  I couldn't jump fast enough at the opportunity to use some great crafting supplies to create something to gift to someone as a Random Act of Kindness.  Picking a project was easy enough, I guess.  {Not really.  Every new page I looked at on the website gave me a new idea I wanted to try.}  Finally, I settled on making embroidered snowflake ornaments.

Embroidered Snowflake Ornament Tutorial at /
The hardest part was trying to hone in on just one person to make something for.  Our lives have been so very blessed this year by so many people -- our families, for sure, and our close friends.  We couldn't have made it through without them.  But there is one person who reached out to me and touched me so deeply that it literally changed my heart and taught me the single biggest lesson I have learned in quite a while. 

Many of you know that my husband was out of work from March through October.  That was rough for both of us.  It wasn't just the worries about how we were going to take care of our children financially, though those were very real.  It was hard trying to stay busy and keep life as normal as possible when all we really wanted to do a lot of the time was cry and give up.  We both did our very best to put our brave faces on every morning and find things to keep our hands busy and our minds off of our troubles. Some days were better than others, but whenever anyone asked me how we were doing, I invariably said, "It's fiiiine."  Of course it wasn't fine, but what use was it to complain?!  Or -- heaven forbid -- admit we needed help.  

One afternoon in particular I was really having a hard time.  We are deeply religious and our faith means everything to us, but on this day I was so over it.  I felt completely abandoned by everything that had ever brought me comfort before.  I didn't want to see anyone or talk to anyone. I just wanted to mope and feel sorry for myself, I guess.  My phone rang and I saw on the caller ID that it was a casual friend from church who I have known for years.  Normally I don't mind talking to her, but on this day I WAS NOT going to answer that phone.  I was just sure she needed a favor from me and I was not in any mood to be helpful.  Something within me said, "You better answer that phone, you big baby,"  and so I picked it up right before it went to the answering machine, hoping it was her husband calling for Brent.

No such luck.  It was for me, but I was not expecting the conversation that was coming.  "How are you doing?" she asked.  Typical.  That's the go-to conversation starter, especially when people know you're going through something.  "We're fiiiine," I gave my standard reply.  "No.  I have been thinking about you all morning.  How are you really doing?"  I couldn't even reply because I was fighting back tears.  "What can we do to help?" she asked after several moments of silence.  "Nothing.  Things will work out.  They always do,"  I lied.  "Well, {my husband} and I are going to do something for you.  What do you need?"  What I wanted to say was, "Hope?  How about a reason to get out of bed tomorrow?  Or a job would be good.  We need a job.  Or $1200 to pay the mortgage. No one has any of those things to just give away."   What I did say through my tears was, "I really don't know.  Nothing.  It's so nice of you to think of us.  We'll be fine."  She just let me cry for a minute and I felt like an idiot, then she said, "We'll figure something out and I'll call you back later."  We ended the phone call with me saying, "Oh, please don't worry about us.  I'm just having a bad day.  We're fiiiine."  

Obviously she wasn't convinced because she showed up on my doorstep a few hours later and handed me an envelope full of money.  "It's not much, but we've been where you are and we just love you guys and we wish we could make this all go away for you," she said.  I cried, and thanked her, and cried, and apologized for crying.  She said, "Don't apologize for crying.  If you had called me yesterday I would have been the one crying on your shoulder."  As we talked I learned that she had just made a devastatingly hard decision about one of her children the day before.  She was at peace with it at that point, but the previous day had been difficult for her.  After she left I couldn't help thinking about what she had said -- If you had called me yesterday . . .   She hadn't meant anything by it, but it bugged me.  Why hadn't I called her yesterday?  Why was I so wrapped up in myself, wallowing in my own "misery", that I didn't think about the people around me?   That I didn't even think about the burdens everyone else is carrying?  Life isn't easy for any of us, really.  It's just different kinds of hard.

I decided then and there that I wanted to be more like my friend.  I wanted to pick myself up out of my own emotional muck and see what I could do for others.  I wanted to think of myself less and throw myself into serving others.  I'm not perfect.  I'll never even be as good as my friend is at it, but I'm trying and I am a much happier person for it.  I'll never tell who it was because she would be mortified if anyone knew.  She's that amazing kind of person who doesn't do nice things for the recognition. I really wanted to make her a little gift so she knows that I have been thinking about her, too, and that she has changed my life.

Phew!  Enough of that!  Let's talk crafts now.  I'm much more comfortable talking crafts.   These embroidered snowflake ornaments are so easy you could make a bunch for all the people who have touched your life, too. 

Embroidered Snowflake Ornament Tutorial at /

 Supplies:

2-3 skeins embroidery floss {I used white, but you could use any color or combination of colors you prefer}
embroidery needles
1/4 yd. canvas fabric
hot glue gun and glue sticks

Step 1:  Prepare your Fabric

Cut your canvas fabric into 8x8 inch squares.  These don't need to be perfectly square.  You just want to make sure you have plenty of extra fabric around the edges so you won't run into trouble trying to center your finished designs.  

Next, if you're super artistic, draw out your snowflake shapes lightly in chalk or pencil onto the right side of each piece of fabric.  If you're more of a perfectionist {like me}, you can google "free snowflake embroidery patterns" and find a ton of ideas.  I didn't end up following the patterns exactly, but I felt much better using them as a jumping off point.  Just print out the patterns you like, rub chalk on the back of the pattern, carefully lay the pattern in the center of your fabric, then trace the outline with a pencil. 

Embroidered Snowflake Ornament Tutorial at /
Step 2:  Embroider your Snowflakes

What I loved so much about this project is how creative you can be!  There are a multitude of different embroidery stitches you can use to make each snowflake unique.  Once you have outlined the basic shape that you traced, you can go back and add more detail in and around the shape until you're happy with the way it looks.  I'm no expert at embroidery -- just make things up as you go!  Here's how the basic pattern in step 1 ended up:

Embroidered Snowflake Ornament Tutorial at /
I love french knots -- you can never add too many of them, in my humble opinion.  

Step 3:  Add the Finishing Touches

Once I was happy with the embroidery, I adjusted my design to make sure it was centered in the embroidery hoop and the fabric was pulled taut all the way around. Also make sure that the screw of the hoop is at the top of your embroidered design.  Then tighten up the embroidery hoop and trim off the excess fabric, leaving about 1/2" all the way around.  Using hot glue, fold that excess fabric around to the back of the frame and adhere it to the wood.  

Cut a piece of grosgrain ribbon about 6" long to form a loop for hanging the ornament.  Attach each end of the ribbon to the front of the hoop with hot glue right in front of the screw that holds the hoop closed.  Then tie a small bow out of the ribbon and adhere it to the hoop at the base of the hanging loop.

Embroidered Snowflake Ornament Tutorial at /

Easy-cheesy, and so fun!  You can't really mess it up, which is my favorite kind of craft.  We all have wonderful people in our lives.  Who would you create a Random Craft of Kindness for this holiday season?  Here are some projects other bloggers created to inspire you:


You can find ConsumerCrafts here:
Instagram: "#"consumercrafts 
Blog: http://www.craftsunleashed.com/


This post is sponsored by ConsumerCrafts.com as a part of a Blueprint Social Campaign. I received product and compensation for sharing my experience with my own craft project and tutorial in my own words.  All opinions are 100% my own.

11.25.2013

Winter Wonderland Tablescape

Easy and Inexpensive Ideas to spice up your Holiday Table at /

About a week ago we had our annual Christmas social for the women at church.  Christmas BEFORE Thanksgiving?!  Yes!!  We are all moms and/or grandmas and many of us have full-time jobs, so we wanted to enjoy our Christmas social together before we all get so busy putting on Christmas for our families.  It was really a lot of fun.  Ten women got to "host" tables for the evening, decorating them in their own style. I wish I had taken pictures of all the tables -- they were each so beautiful in their own way.  I especially loved my friend Tammy's table decorated with all the ornaments and goodies they have picked up in their family's world travels.  So awesome!

This was the table that I created for the evening.  By thinking outside of the box, there are a few really easy, inexpensive things you can do to spice up your holiday home decor!

Easy and Inexpensive Ideas to spice up your Holiday Table at /

It's hard to see in the photos, but my white plates have an embossed snowflake design around the edges.  I love them because they can be used in so many different ways.  Usually I use them with red dinner plates underneath since my Christmas decor is mostly red and white with a little black thrown in.  Since this was a women's event, I decided to switch it up and do something really pretty and less traditional by pairing the snowflake plates with my everyday turquoise dinner plates and light green cloth napkins.  I also added a square of gold polka dotted burlap as a table topper to add a little glitz.

Easy and Inexpensive Ideas to spice up your Holiday Table at /
 These snowy Christmas tree plate toppers are just ice cream cones rolled in melted white chocolate and sprinkled with sugar crystals and white sprinkles.  They looked pretty and were a nice little {inexpensive} take-home gift for the ladies at my table.  {Plus, they were really, really yummy!}

Easy and Inexpensive Ideas to spice up your Holiday Table at /

For the centerpiece, I did a grouping of glass jars and pretty presents.  A couple more of the ice cream cone trees ended up in jars with the extra sugar crystals and sprinkles in the bottom to make "snow".

Easy and Inexpensive Ideas to spice up your Holiday Table at /

My favorite thing on the table were these little Christmas house winter scenes in jars.  I bought the houses at the dollar store {love that!}, but they were pretty ugly to begin with.  I sprayed each house a solid color with spray paint from my stash, then used a small brush and craft paint to add some detail.  I painted the roof and all the trim white really quickly -- it's not perfect and it doesn't really need to be -- and painted the front door pink for an accent.  Once all the paint was dry, I sprayed it with a pearlescent top coat to give it the look of a vintage glass ornament.  To top it all off, I painted a layer of Mod Podge onto the spots where I wanted it to be snowy and sprinkled Epsom salt on top.  They turned out sparkly and pretty and way more expensive looking than they really are.  I placed each house in a jar filled with Epsom salt and stuck some tinsel trees down in there, too.

Easy and Inexpensive Ideas to spice up your Holiday Table at /

I also picked up some styrofoam balls at the dollar store, painted them with a layer of Mod Podge, and rolled them in Epsom salt to create snowballs which I stacked up in a white ceramic bowl.  That sparkly gift box in the background is from several years ago when I wrapped all my presents like that.  {I know, I am a lunatic.  I wrapped ALL of my gifts in white paper that year then sprayed them with adhesive and rolled them in clear glitter.  It was awesome, but I'll NEVER do it again.  Just sayin'.}

My table stuck out like a sore thumb in the sea of red and green tables, but I loved how pretty and feminine it was.  For less than $20 I was able to repurpose a bunch of items around my house and create a completely new holiday look!  Do you use the same decor every year or do you like to switch things up?

11.21.2013

Big Deal Alert!!

Hi guys.  The i declare! necklace giveaway has ended and the winner has been notified by email, so run check and see if it was you.  I so wish I could give a necklace to each of you.  :-)  I can't do that, but I can do the next best thing . . . let you know about the once a year 40% OFF sale at i declare!

http://www.ideclarecharms.com/affiliate/idevaffiliate.php&id=162

The sale ends at midnight TONIGHT, so if you had your eye on something special, NOW is the time to get it.  These make awesome holiday gifts for the wives or grandmas in your life.  They also have a whole section of running jewelry if you or someone special have a big race you want to commemorate.  Just click the photo above to visit the site and start designing your jewelry.  Have a great day, friends!

11.20.2013

Throw the World's Best Winter Olympics Party with Mario & Sonic at the Sochi 2014 Winter Olympic Games ( Wii U™ )

This is a Sponsored post written by me on behalf of Walmart. All opinions are 100% mine.

The winter Olympics in Sochi are less than 80 days away!  Can you believe that?!  I always loved the winter Olympics growing up  {hello -- figure skating}, but with a husband who grew up in Canada and lived in Switzerland before we got married, our family  lu-uh-uves the winter Olympics.  Wouldn't it be fun to throw a Winter Olympics party to celebrate?

 photo MarioOlympicslogo_zpsc3c5ff64.png

Of course, the party headliner would be the new Nintendo Mario & Sonic at the Sochi 2014 Winter Olympic Games video game for Wii U™.  Playing as your favorite classic characters {each with their own special moves and stats}, you and your friends can compete in events like Snow Day Street Hockey, Rollercoaster Bobsleigh, and more supercharged Dream Events.  In Biathlon, a cross country skiing and shooting event, you’ll even use both the Wii U™ GamePad and Wii Remote™ Plus controllers,switching on-the-fly to earn the coveted Gold Medal.  This fun game even includes new events, Figure Skating Pairs and Snowboard Slopestyle, which will make its Olympic debut in Sochi, Russia.

For the first time, you can compete in online multiplayer events to help your home country earn the best ranking! Country rankings can be viewed in-game based on high scores, adding a fun element of global competition.  Or just keep it local and compete head-to-head in 4-player action or demonstrate your team spirit in cooperative team events.  My kids and their friends {heck, me and my friends!} would spend HOURS enjoying all the fun features of this new game!

Of course your friends will need some treats to keep the energy up during the competition.  Here are a few ideas to get you started:

Adorable Olympic torch cupcake cones from Creative Party Ideas by Cheryl would be a big hit with the kiddos!

Flag Freezer Pops Recipe

These World Flag freezer pops found on Tablespoon look as cute as they are tasty.

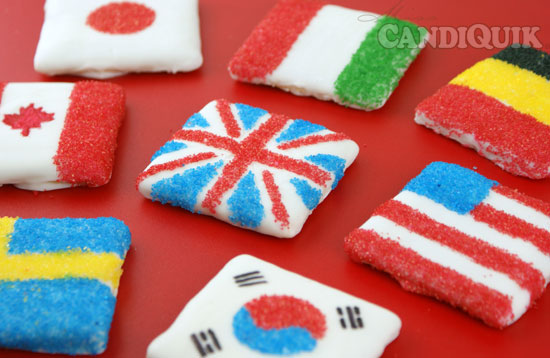
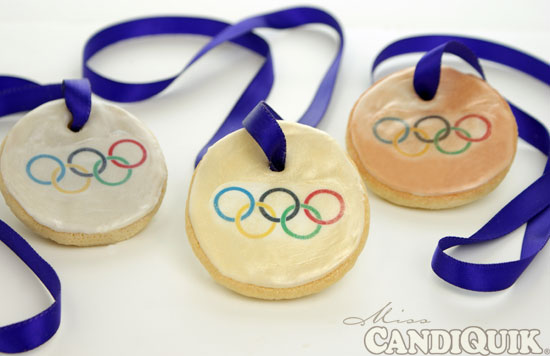
Miss Candiquick has several fun treat ideas, including these World Flag Graham Cracker Cookies and Sugar Cookie medals.

A fruit tray featuring all the Olympic colors would also be super yummy.  You're only limited by your imagination here! 

I think I know what my kids will be getting for Christmas this year . . . Mario & Sonic at the Sochi 2014 Winter Olympic Games for Wii U™ . . . so mommy and daddy -- I mean, Mario and Princess Peach -- can practice up on their Pairs Figure Skating Skills and bring home the Gold at our party!!  What event are you most excited to try out and who is your go-to character?

Visit Sponsor's Site


11.18.2013

DIY Ruffled iPhone Wallet

DIY Ruffled iPhone Wallet at /

I am always a little bit surprised to see which of my posts really hit with you guys and which ones kind of fizzle.  My iPhone wallet has been such a HUGE hit and I am thrilled that many of you have found it helpful.  The cute coral and navy one I originally made was looking a little dingy because I literally take it everywhere I go.  I could have just spot-cleaned it, but the snap was a little bulky and they're soooo easy to make, I decided to make a new one and tweak things a little bit.

Pin It

11.15.2013

Gratitude Chalkboard

Every year in the month of November, all over the blogosphere, I see a million fun ways that families recognize their blessings.  Every year I think, "That's a great idea," and then every year I do nothing.  I mean, we talk about our blessings and the importance of gratitude in our Family Night Lessons, and I usually do some kind of fun quote on our chalk wall, but I've never had an interactive display for my family.  Since I recently made my decorative chalkboard, I thought this would be a perfect time to start.

Use your decorative chalkboard to express your gratitude for blessings!  at /
 Clearly my kids are still getting the hang of this,  Or maybe they're just weird teenagers.  Either way, I'm grateful for them.  Hopefully by the end of the month we will have the chalkboard all filled up.  I put a few cute accessories out to round out the vignette.

Decorating for Thanksgiving!  at /

{Can you believe that pretty fabric pumpkin is really a roll of toilet paper?!}  We're having a good time trying to come up with things to add to the chalkboard as we eat dinner every night.  This may just become a new tradition for us!  Do you have a way that you celebrate your blessings this time of year?


I'm super grateful for all of you who stop by and read this-here blog every day.  Make sure to go enter the i declare! necklace giveaway I have going on right now to reward one of you, my faithful blog friends.  Hope this season is a wonderful one for you and yours!

11.13.2013

i declare! charms GIVEAWAY

i declare! necklace giveaway at /

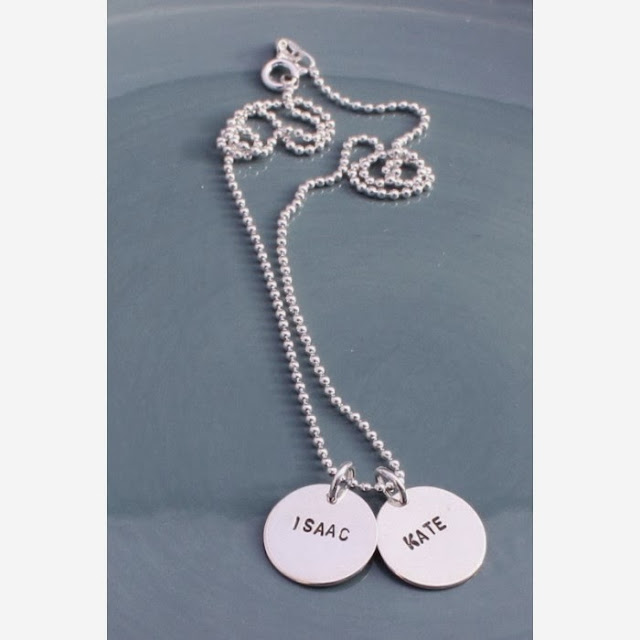
Recently I was introduced to i declare! charms and I am so excited to share them with you guys!!  They make absolutely beautiful hand stamped necklaces and bracelets that you can personalize.  It's the ultimate meaningful gift idea for the holidays or any time.

Years ago my husband gave me a necklace for mothers day that had tiny little silver disks with my children's names on them. It was a complete surprise.  I LOVE that necklace.  I have worn it just about every day since he gave it to me.  Next to my wedding ring, it's my most beloved piece of jewelry.  Turns out, Brent ordered it from I Declare!  When he saw my new necklace come in the mail he said, "Hey!  That's where I got your other one from."  Who knew?!

So, not only can I tell you how gorgeous this jewelry is, I can tell you that it holds up well over time, too.    Every time I wear my kids' name necklace I get compliments on it.  It's so simple and pretty, but also makes a statement, which I love.  I can even wear it with my more chunky statement necklaces and they look great together.

i declare! necklace giveaway at / Since I already have a necklace for my children, I decided to get one in honor of my husband.  It says "forever" and has our wedding date underneath.  It is stunning in it's simplicity!  I will wear this alongside my other one every day from now on.  The quality is second to none.

Here's the part I am most excited about!  I get to give one of i declare!'s Classic Name Necklaces to one of you!!  I'm telling y'all -- you're going to love this. 

i declare! necklace giveaway at /

a Rafflecopter giveaway


This giveaway ends next Wednesday, November 20th at 12:00 a.m.  Winners will be chosen by Rafflecopter and will be notified by email.  Good luck, friends!


**This post contains affiliate links.  I was given product in exchange for an honest review.  As always, all opinions are 100% my own.**

11.11.2013

Double Layer Pumpkin Pie

Double Layer Pumpkin Pie recipe at /

It's that time of year again -- when "Pumpkin Everything" and "Pie Season" collide!  I love it.  This pie is a family favorite, so we make it every year.  The pumpkin and cream cheese flavors are perfect together and, oh, how I love graham cracker crust.  It only takes a few minutes to whip up, but tastes like a million bucks!

Double Layer Pumpkin Pie

5 Tbsp. butter, melted
1-1/4 C. graham cracker crumbs
1/4 C. sugar
 
1pkg.  (8 oz.)cream cheese, softened
1 cup  plus 1 Tbsp. milk, divided
1 Tbsp.  sugar
1 tub  (8 oz.) COOL WHIP , thawed, divided
1 can  (15 oz.) pumpkin
2 pkg.  (3.4 oz. each) vanilla instant pudding mix
1 tsp.  ground cinnamon
1/2 tsp.  ground ginger
1/4 tsp.  ground cloves
 
 
To make pie crust, melt butter and stir in graham cracker crumbs and sugar.  Press evenly into 9-inch pie plate. Bake at 350 degrees for 6-8 minutes.  Allow to cool completely.  {Or cheat like I did this time and buy one ready made!}
 
Make first layer of pie filling by beating cream cheese, 1 Tbsp. milk, and 1 Tbsp. sugar with a whisk until it is well blended.  Stir in half of the tub of Cool Whip and spread the cream cheese mixture in the bottom of the cooled crust.

Make the second layer of the pie by whisking remaining 1 C.  milk, pumpkin, dry pudding mixes and spices together until smooth. (Mixture will be thick.) Spread over cream cheese layer.  Refrigerate 4 hours or until firm.  Top with remaining Cool Whip before serving.
 
Double Layer Pumpkin Pie recipe at /
 Isn't she a beauty?!  But it's what's on the inside that counts . . .

Double Layer Pumpkin Pie recipe at /
Mmmmmmm . . . look at those layers of fluffy cream cheese and spicy pumpkin.  Delicious!!  I can't wait for Thanksgiving {and more pie!} in a few weeks.  What is your favorite kind of pie?  In our house cream pies beat out fruit pies, but just barely.  

Have a great week, friends!!

11.09.2013

Gilded Pinecone Thanksgiving Wreath

DIY Gilded Pine Cone Thanksgiving Wreath at /

Hi friends!!  Today I'm sharing this little wreath project that I gave you a sneak peek of yesterday on Facebook.  I found this great square pine cone wreath at Target several years ago.  It seems like every year when I pull it out of storage it has lost a few more pine cones and it was looking like its best days were behind it.  I've seen very similar sad-looking wreaths at the thrift store, too.  I love to reinvent things and save them from the trash heap so I knew I had to give this one a shot. 

To begin, I filled in all the holes from pine cones missing around the wreath by pulling off all the pine cones in one corner and hot gluing them into the the gaps.  If you don't already have a pine cone wreath to work on, you could begin by hot gluing pine cones onto a wreath form, leaving a small section uncovered to add rosettes. 

Once I had all the pine cones where I wanted them I gave it a light coat of gold spray paint.  I absolutely love the gold trend in home decor lately!  You can go as light or as heavy as you want with the gold spray paint.  I wanted to just hit the tops of the pine cones to give it some shimmer while retaining a more rustic look, so I didn't worry about getting paint in all the nooks and crannies.

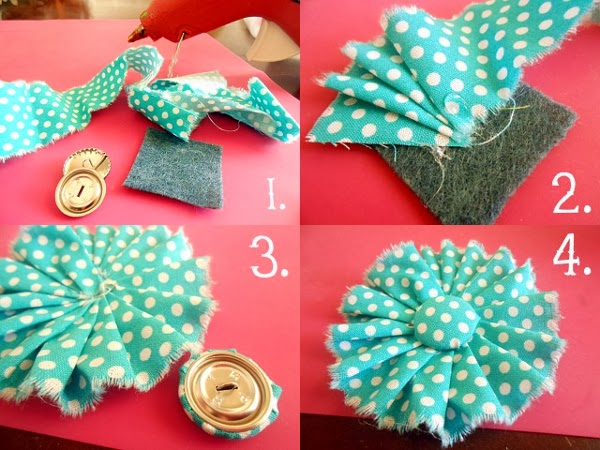
While the paint was drying, I made some easy burlap rosettes.    These pictures show a different fabric, but you get the idea, right? 

DIY Gilded Pine Cone Thanksgiving Wreath at /

For the rosettes you will need:

a strip of fabric 1-2 inches wide by about 18 inches long
a small square of felt
a button for the center {I used fabric covered buttons in these pictures, but used vintage-looking gold buttons on my finished wreath}
and a hot glue gun.

Keep in mind that your finished rosette will be roughly twice as wide as you fabric strip is so the wider your fabric is, the larger your rosette will be. Form the rosette by attaching the end of the fabric strip to the felt square with a dab of hot glue, then continuing to dab glue and pleat the fabric all the way around until you get back around to where you started.  Hot glue a button in the center of the rosette to finish it off.

DIY Gilded Pine Cone Thanksgiving Wreath at /
 Arrange the rosettes to fill the empty space on your wreath and attach them with more hot glue.  I wanted to add something to the top corner to balance the rosettes visually, so I created a pennant banner.  Just print out your letters onto old book pages and cut them out in any shape you choose.  Fold the top edge back over a piece of twine and secure with glue.  

DIY Gilded Pine Cone Thanksgiving Wreath at /
Leave about 12 inches of twine on each end of the banner and use that to attach it to the wreath by wrapping it around and tying a bow.

DIY Gilded Pine Cone Thanksgiving Wreath at /
I love that I was able give a tired old wreath some fresh life again!  And the glittery gold touches look so pretty against my black front door.   Sadly, not one person in my family noticed it when they came home yesterday.  They tell me it's because I change things around here so much they're "numb to newness".  Whatever.  I love it and that's what really matters.

Have a great weekend, guys!

11.08.2013

The {Ten Minute} Statement Necklace

A fun Statement Necklace you can make in about 10 minutes at /
Gah!!  This week has been exceptionally frustrating.  I have had this project ready to share with y'all for days and I am IN LOVE with it, but I haven't been able to log into {or even view} my blog for the better part of the week.  I've about had it with computer issues.  Luckily, I tried one last time tonight to log in and, lo and behold, it finally worked!!  I'm so done.  I just can't.  Anyway . . .

I adore big, chunky statement jewelry.  You know, that one piece that "makes" the outfit.  I used to be a bracelet girl, but in the past few years necklaces have become my go-to accessory.  When I received a box full of these pretty white beads from Wholport this month, I knew exactly what I wanted to make with them.

This is maybe the easiest piece of DIY jewelry you will ever make.  I'll show you how.

You will need:

about 100 1/2-inch round beads
3-4 feet of coordinating ribbon or twill tape
1 roll of very narrow ribbon in the same {or similar} color as your beads
needle and thread

A fun Statement Necklace you can make in about 10 minutes at /

Begin by stringing your beads on the narrow ribbon.  I used a small piece of tape on the end of each piece of ribbon to make it easier to get it through the small opening in my beads.  You will need 5 strands of beads:  one with 16 beads, one with 18 beads, one with 20 beads, one with 22 beads, and one with 24 beads.  Having each string increasingly longer helps the necklace to hang better when you wear it.

Next, cut your coordinating ribbon or twill tape {pictured here} into two pieces:  one about 18 inches long and one about 24 inches long.  I made them different lengths because I wanted my bow to be on one side of the necklace.  If you want yours to tie in the back of your neck, make them equal lengths.

A fun Statement Necklace you can make in about 10 minutes at /

Fold the cut end of one piece of your ribbon or twill tape back about an inch.  Pin the ends of the strings of beads to the back side of the folded end and stitch in place.  I used my sewing machine and did a quick zig-zag stitch across through all the layers of ribbon.  If you don't have a sewing machine, just use a needle and thread {or even hot glue}.  Trim the ends of the narrow ribbons even with the edge of the wider ribbon.

Repeat the above process for the other ended of your strands of beads using your other piece of wide ribbon.

A fun Statement Necklace you can make in about 10 minutes at /
I cut two more pieces of twill tape about 3-inches long to cover the stitching and give the necklace a finished look.  Just wrap the piece around the spot where your twill tape meets the beads, folding the raw edges under in the back and sew it in place by hand with an invisible stitch along the lines marked in the picture above.

A fun Statement Necklace you can make in about 10 minutes at /

That's pretty much it!  Just tie the ribbon ends together so necklace is the desired length and trim the ends.  I left my necklace long enough that I could put it on and take it off over my head to avoid tying and untying it a million times.

A fun Statement Necklace you can make in about 10 minutes at /

Sorry for the grainy iphone photos.  I am so obviously NOT a selfie-taker, but I wanted to show you what it looked like on because the flat pictures didn't quite do it justice.  Here's one more clear picture of it flat so you can really see the details:

A fun Statement Necklace you can make in about 10 minutes at /

I absolutely love the way it turned out!  It's casual, but it dresses up a t-shirt and jeans just enough, and it will also look awesome with my lace pencil skirt and pale turquoise cardigan for Christmas.  Love it.  I think I may have to make a few more in other fun color combos and make it my signature piece!

Thanks so much to Wholeport for providing the delicious-looking beads I used for this necklace.  Their bead prices are unbeatable.  I have my eye on some jade beads for another necklace already.  Check them out if you are looking for really high quality products at fantastic prices.

**I was given product to create a project and share my experience in my own words.  As always, all opinions are 100% my own.**

Related Posts Plugin for WordPress, Blogger...