My 3 Monsters: February 2013

Recent Posts

2.21.2013

Girls Camp Fundraiser 2013
{or Where I've Been for the Past Few Weeks}

It's getting to be about that time again . . . GIRLS CAMP!!!!  It has been my great privilege to go to Girls Camp with my spectacular group of Young Women for the past seven summers.  This year make eight and I am thrilled.  Even though it's tons of work and I maybe complain a little bit and cry a lot in my preparations.  Every. Single. Year.  Because I'm just the tiniest bit unstable like that.  But that's another story.

The worst part about camp every year is the fundraiser.  Truthfully, it's not all that bad ever, but I am lazy and would love it if money for camp would just rain down from the heavens every year.  Alas, it does not and so we fundraise.  This year I took to the internet to find a new and clever idea -- we've done dinner/ silent auctions and freezer meals and bake sales in the past -- and I was slightly disappointed in the results my search turned up.  There were a few really great ideas that we incorporated into our overall plan, but not a ton like I expected.  For that reason alone, I am sharing what we did in the hopes of lightening someone else load at some point.  The more ideas we put out there, the deeper the pool we have to fish from later, right?

We decided to capitalize on Valentine's Day this year {everyone else does -- why not us?!} so we sold chocolate dipped strawberries and put on a formal-ish date night/dinner with an Old Hollywood theme for the adults in our area.  We also offered babysitting for couples who would rather drop off their kids and go out for a date that night.  Here are the fliers I created to advertise the event:


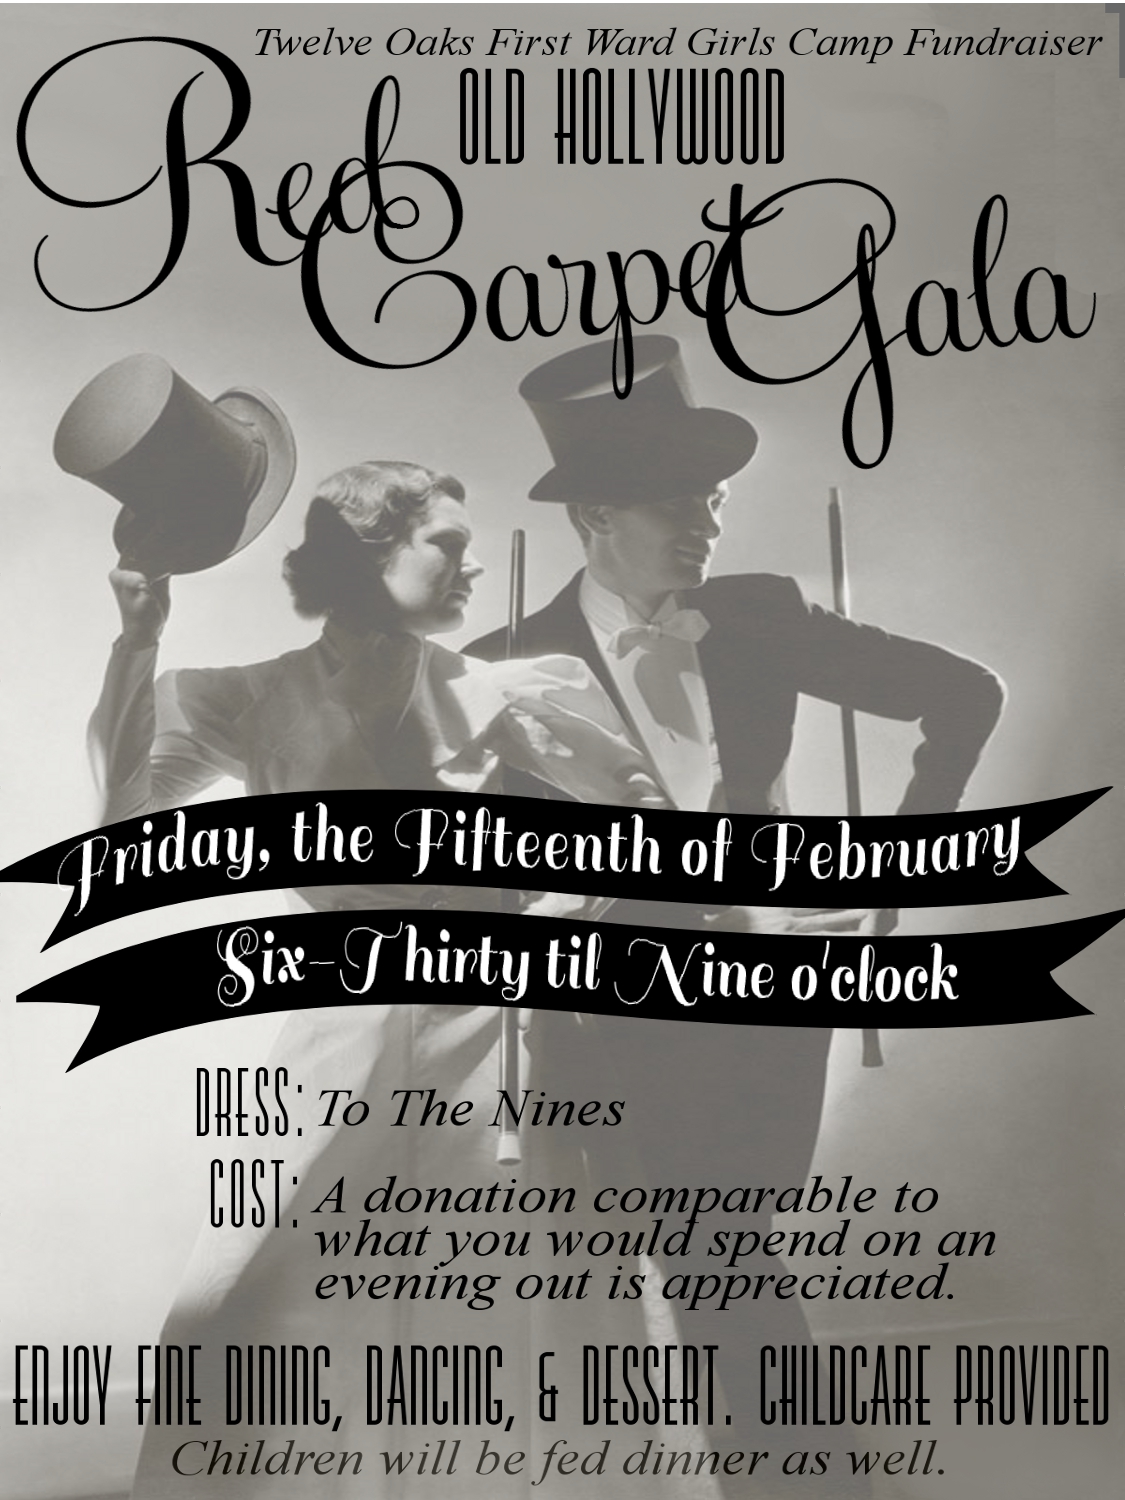
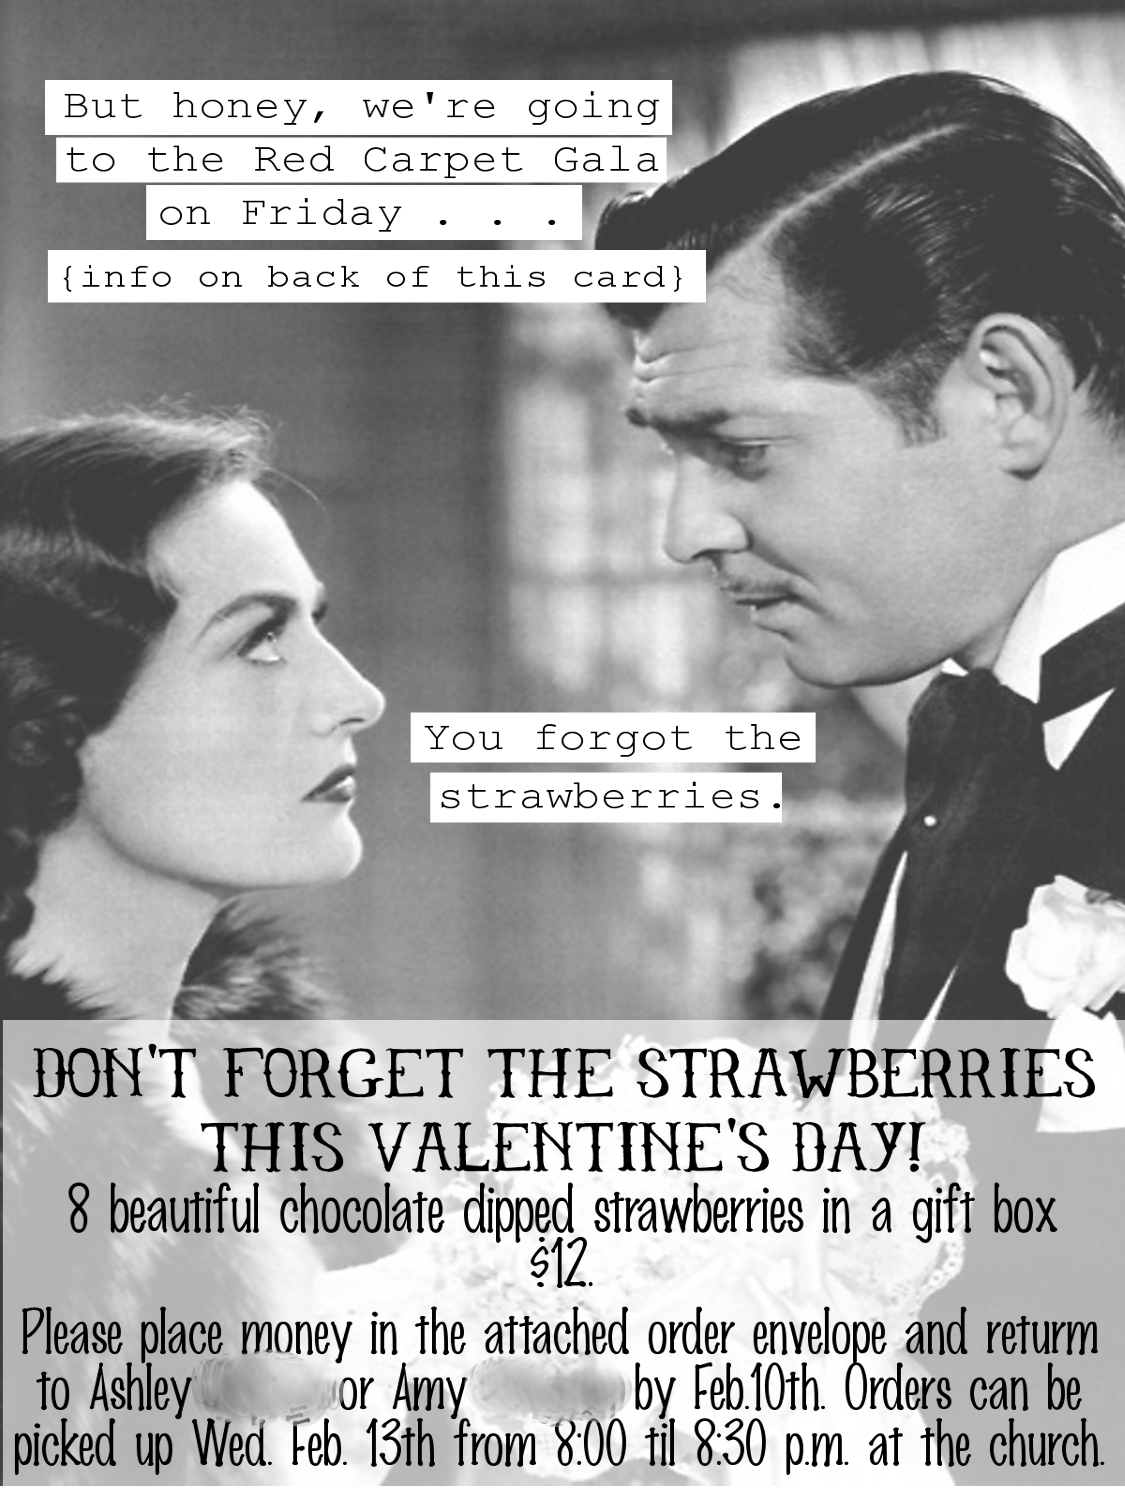
I had them printed front and back on cardstock {4 to a page} at Staples print center so they weren't super expensive, even though they looked like a million bucks.  I think the key to getting people excited about an event like this is to make it look like it's going to be worth their time {and money} to participate.  A good invite gets that ball rolling.  *Here's my FIRST bit of advice:  check and double check the calendar before you print the invitations so you don't accidentally plan your fundraiser on the same night as another event, such as temple night.  Big Mistake!  So we actually had our dinner on Valentines Day itself, which worked out nicely, I think.*

Here are blank copies of the invites should you want to use them and add your own information:


Just click on the images to enlarge, then right click and save to your computer.

We got some great tips for the chocolate dipped strawberries from Our Scoop.  We used the dipping chocolate recipe found there, which worked out great!!  *Here's my SECOND tip:  I bought a bunch of white mini-cupcake papers that we flattened out and placed the strawberries directly into after they were dipped.  This kept things a little cleaner and made the finished boxes look really cool and professional.  We also drizzled white chocolate over the dark chocolate to fancy them up a bit.  Teenage girls are AWESOME at that!  They got really creative and did a nice job.*

The girls dipped the berries during our regular Wednesday night activity time.  As half of the girls worked on the berries, the other half worked on preparing the salad for the dinner the following night.  We used this recipe for 24 Hour Salad.  It made three huge foil pans full of salad.  We probably fed about 50 people and had one whole pan left over.

For dinner we served the salad and  this delicious baked chicken which was a huge hit.  I divided the recipe by 5 {more or less} and we had PLENTY for the people we served.  I bought 40 pounds of boneless, skinless chicken breast, 12 boxes of dry onion soup mix, 3 pounds of apricot jam, and 10 bottles of Russian salad dressing.  Follow the rest of the directions as they are written.

I also bought rolls and four packs of frozen restaurant-style mashed potatoes from Costco to round out the meal.  You could make the potatoes from scratch, but I opted for simplicity.  We heated the potatoes in the microwave and stored them in a crock pot to keep them warm until we served the dinner.

We set up the gym with a "dance floor" at one end and all the round dinner tables filling the rest of the room.  Everything was gold, silver and white with a little bit of black.  We strung white twinkle lights across the ceiling of the dance floor area and dangled gold stars from the strings of lights so it looked like a pretty night sky.  We played Harry Connick, Jr. from my husband's iPod through the church's speaker system for romantic background music.

I found some cute movie clap boards at the party store that we used as centerpieces on the tables along with stills from classic movies {found on this great website} framed in mirrored frames from the dollar store.  The girls sprinkled fake diamonds on each of the tables , too, for a little bit of sparkle.  I had planned to buy gold and silver metallic star-shaped balloons for each centerpiece as well, but the dollar store was out of helium that day.  Boo.


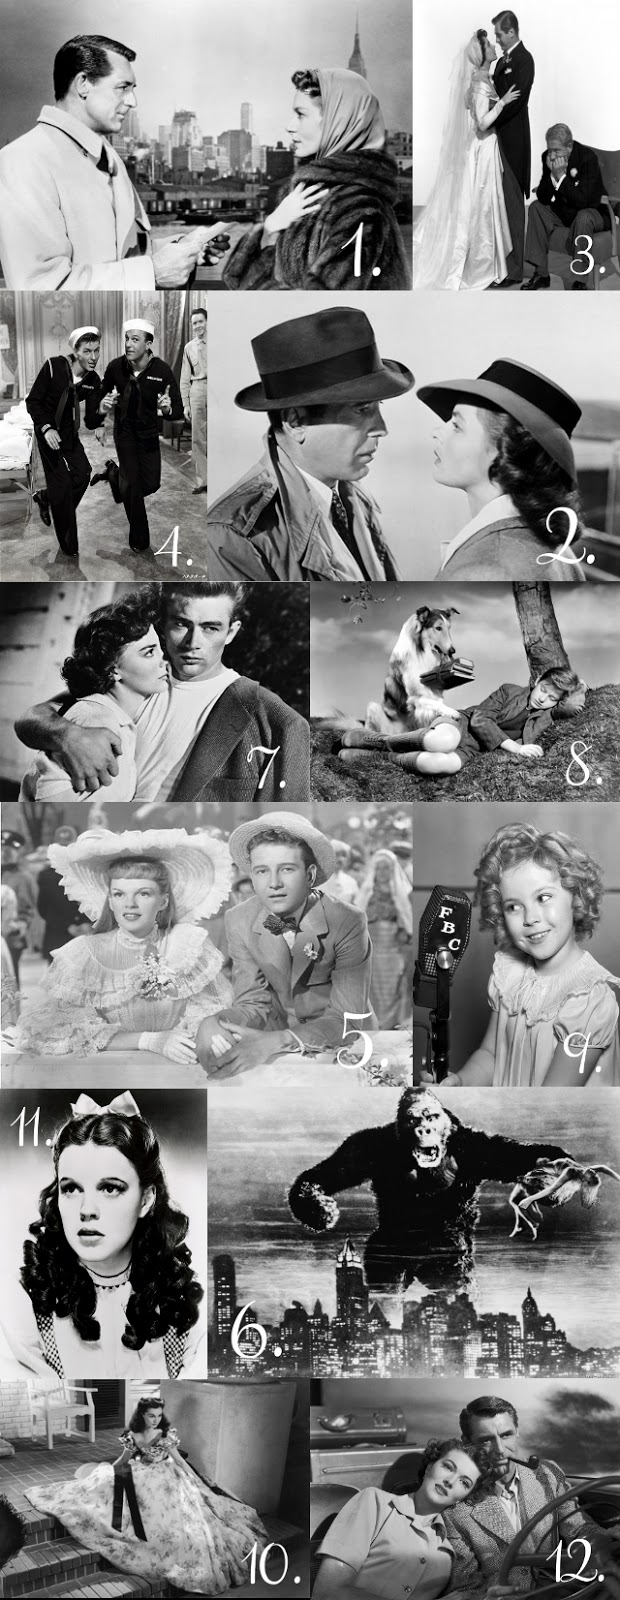
Since we had the still shots from the movies, we decided to turn it into a game. I numbered each of the pictures from 1-12.  As each couple arrived that night they were greeted at the door, their children were escorted into the children's area and the adults were given a piece of paper and pencil and told to write down the names of the movies pictured on each table.  The couple that correctly identified the most movies won a pair of movie tickets they could use at a later date.  This was great because it got people up out of their seats, mingling for the first 20 minutes or so as they tried to identify the movies. {Plus, it made the evening seem a bit fancier and people had fun.} The girls served them Shirly Temples {ginger ale and grenadine syrup} as they mingled.  I was so excited that people really did dress "to the nines" for this event.  So. Much. Fun!

The couples were seated and then the girls served them dinner at their tables.  The adult leaders plated the food in the kitchen and sent it out with the girls.  It was a miracle!  Nothing was spilled and the food was all warm and delicious. Everyone had plenty to eat and it seemed like folks were having fun chatting at their tables.  The girls served strawberry shortcake and chocolate dipped strawberries for dessert and then people mingled and danced for the rest of the evening.

The girls were divided into three teams and rotated responsibilities {childcare, kid's crafts and serving} every 30 minutes so that they all got a chance to do everything.  They had fun.  The kids had fun.  The adults had a fantastic time {at least at my table}.  I couldn't be more pleased with how it turned out.  My goals for the evening were for the girls to WORK and for the people who attended to feel like it was worth their time and money.  I think we accomplished both of those objectives.  At 9:00 we had to turn up the lights and let the kids loose or else the adults would have stayed all night. 

I hope the ideas and resources we gathered for our event helps someone else out there.  If you have successful fundraiser ideas please share them.  I'll likely be looking for them again next year!

2.16.2013

Favorite Font Combos

We've already established that I am a little bit of a font hoarder. Since I have started creating printables and graphics for my blog, I have learned that mixing fonts can either make or break a project.  Using incompatible type faces can make a graphic look messy and cluttered.  But when you find just the right combination it can really take a project to the next level.   I thought I'd share some of my favorite font combinations with y'all today.  Remember, I'm no expert.  There is no solid logic behind my choices -- they're just easy on my eyes and make my heart sing. {Click on the font name in the graphic below to go to the download link.}

Image Map

Here's a brief tutorial on installing fonts on your computer after you download them, too.   I'd love to know what some of your favorite font combos are.  Have a great weekend, friends!


2.11.2013

Styling The Kids {on a Budget!}


Have you ever tried to take a decent picture of your boys?  It's, like, impossible, right? Maybe it's just me.  I couldn't get my boys to stop "Zoolander-ing" for more than a few seconds at a time.  Whatever.  My kids are their father's goofy children.  That's not the point of this post. 

The clothes.  Look at the cool new clothes.  I got my boys to wear pink!  Magenta.  Fuchsia Islands, actually.  If Old Navy carries it, it must be cool.  We did a little shopping at the Old Navy Kids & Baby Sale this past weekend and got some really great deals.

That expression was almost normal.  The "Fuchsia Islands" striped tee was only $8 and it comes in other bright, springy color combos.

I'm loving this plaid button-down shirt for $15.  Sometimes it's fun to see my boys in something other than a tee shirt.  He styled it with this ultra-cool hoodie  and skinny jeans {$10 and $15 respectively.}  My little lady-killers are going to knock 'em dead on Valentine's day in their new "pink" outfits.

They're also set for summer to begin with plaid shorts, swim trunks, and $5 graphic tees.  Old Navy is the best when you have three kids to outfit for each new season -- on a budget.  We're Old Navy fans from waaaayyyy back.  Sis's first sentence was, "Go to Old Navy, get a new dress,"  when she was just a wee thing.  Because that's what we did . . . almost every Saturday.  She and I still love shopping there together.  {Their Perfect-Fit Tees are perfection.  Hence the name, I suppose.}  Don't just take my word for it, head to your nearest Old Navy and check out the Kids & Baby Sale for yourself.  Like, now.  The deals are that good.

I was selected for this opportunity as a member of Clever Girls Collective, and the content and opinions expressed here are all my own.

2.09.2013

DIY {You Blow Me Away} Valentines

I found some cute heart-shaped whistles on clearance after Valentine's Day last year for about 10 cents a bag.  Even though I only have one kid who still passes out valentines, and he's a boy, and his teacher will hate me for passing out whistles, I had to buy them.  I knew I could make something fun with them.  Luckily D doesn't get too hung up on whether or not things are "cool enough" {or "too cutesy for a boy to give out" -- that's his dad's job} so he is more than happy to give his class these valentines this year.  Hooray for easy kids, right?

These couldn't be much easier to make.  I designed the images in Gimp -- one pink and one red to match the whistles -- and them put them into a pdf file that I could have printed at Staples copy& print center, my new favorite place.


I had them printed in color on white cardstock for about $1 per sheet.  When I got them home, I just cut the cards out with my paper trimmer and used an X-acto knife to cut an X in the upper right corner.

The whistle just pops right in that X and the paper holds it in place.  Quick and easy, like I like it.  And super cute to boot!

I don't know if you can still get the heart-shaped whistles, but Target carries some lip-shaped whistles in their Valentine's section that would work beautifully.  Or you could punch a hole and stick a blow pop in there.  I love to have options!

I think D's 5th grade class is going to love them.  So what if his teacher hates me.  He's my last kid going to that school and he'll be in middle school next year anyway.  No problem.   

Have a great day, friends!

Amy


2.07.2013

Measuring Tape Flowers

 I did it!  I got my little Valentine's Day sewing themed vignette together.  Not in the gloriously beautiful way I had envisioned, but still.  It's a much smaller statement and I really like it.  As a bonus, it's made entirely of things I already owned, so -- FREE.  Well, I did pay to have the picture printed, which was about $5, but I print out all my printables to make sure they look good so that was a sunk cost.


My favorite part of the vignette are those measuring tape flowers.  They just make me smile.  I ordered a custom dress online for my little sister's wedding and it came with that pink measuring tape, which is cute all on its own.  Since I already had several measuring tapes I decided I could spare this one.  I made all three flowers out of one measuring tape, using about 20 inches for each.

I'm a bum and didn't take pictures of how I folded the flowers, but you can kinda' tell just by looking.  I just made small loops with the measuring tape to form 6 or 7 small petals.  The whole thing is held together with a staple in the center {because I just bought a stapler for the first time ever!} but hot glue would also work. Here is a good tutorial you could follow -- it's not how I did mine, but it would work really well.  To finish them off, I hot glued vintage-looking buttons in the centers to hide the staples.

I had to get really creative to figure out how to put stems on them and I'm pretty proud of how they turned out.  I took some silk flowers I had in my craft stash and pulled them apart, without ruining the little plastic center pieces.

The two pieces in front are the ones you want to keep.  Everything else you can toss -- or save for another project.  Stick the little green peggy thingy through the sun-shaped thingy and push it back on the wire stem, like so:

Now fill the sun-shaped thingy up with hot glue and pop your cute measuring tape flower down on top.  Boom.  Stem. 

Use wire cutters to cut the flower stem to desired length and you're done.  {But also pick off that little clump of hot glue stringy stuff.  Preferably BEFORE you photograph it if you want to look like you know what you're doing.} I think they look cute and simple in a little mason jar tied with bias tape.  If I had a sewing room I'd leave these out year-round.

I love it because all that sewing crap is usually sitting out in my house anyway.  Now it is sitting out cutely and looks like it all belongs there.  Genius, right?!  What do you think? 

2.06.2013

Baked Nachos

Hello again, my friends!  As promised, I am back today with a delicious recipe for you.  And, as usual, I am a day late since I told you I'd be back with it yesterday.  Let's be honest, it's all I can do to keep my head above water these days.  Whatevs.

I whipped these up for lunch last week while my parents were here for a visit and they were a hit!  My kids gobbled them right up and they were SO easy to make. I love a win-win.

Baked Nachos
2 lbs. ground beef
taco seasoning
2 cans cream of mushroom soup
1 can RoTel tomatoes
1 bag tortilla chips
shredded cheese

1. Brown ground beef.  Drain any excess fat.  Add taco seasoning, cream of mushroom soup and rotel.  {Phew!  The hard part is done!}

2. In a 9x13 pan layer ingredients:  1/2 of your tortilla chips {broken up slightly}, 1/2 of meat mixture, shredded cheese {as much as you like}, last 1/2 of your tortilla chips {again, broken up}, 1/2 of meat mixture, more shredded cheese.

3. Bake at 350* for about 20 minutes or until heated through and cheese is bubbly.  Serve with sour cream, guacamole and/or whatever other toppings you like.  I think sliced olives and shredded lettuce would have been delicious, too.


See?! Easy cheesy.  It's a perfect week night meal for those busy days when you don't really feel like cooking and it feeds a crowd.  I'd love to hear what your favorite easy meals are.  Leave a comment!

2.03.2013

I {heart} Avocados

This is a Sponsored post written by me on behalf of Avocados from Mexico for SocialSpark. All opinions are 100% mine.

AFM_Logo_stack_NoTag_zps2eae3188-1_zpsaf020678-1_zps928fee63

This is not the first time I have sung the avocado's praises here on the blog, nor will it be the last.  I didn't always like them, however.  When I was a kid I thought they were disgusting -- all mushy and green.  And what kind of name is guacamole for a food?!  To be fair, I had never tasted an avocado at that point.  I just thought I didn't like them.  Boy was I wrong.  I've spent the following years making ammends with the fruit I scorned for so long.  {That my be a little on the dramatic side. I just get excited.}

I serve avocados a lot here at my house now.   Guacamole is my go-to topping for any Mexican dish I serve {duh!}, but we also slice avocados up on turkey wraps and sandwiches or serve it mashed with a little lime juice, garlic salt and pepper on toast topped with turkey bacon for breakfast.  I like to eat that same mashed avocado-garlic salt-n-lime concoction with tortilla chips for a quick, light lunch.  And they're a yummy addition to smoothies and green drinks to give them a super creamy texture. 


If you love avocados like I do, Avocados from Mexico is giving you the opportunity to tell the world with their Share the Avocado Love Facebook app.  You can download ringtones, screensavers and wallpapers, as well as send virtual avocado gifts to your friends.  I grabbed the I love avocados badge for my blog side bar -- see it over there?  ------------------------------>


Maybe you wouldn't mind shouting your love of avocados from the rooftops of the real world, not just the online world.  You need to visit the Avocados from Mexico Cafe Press store and get yourself some cool "I love avocados" gear.  I'll be sporting this snazzy, comfy tee when I go to the gym:

You'll also find lots of other t-shirt designs, canvas grocery bags, mugs, and more! Tell me, what other fruit {or vegetable, for that matter} has their own product line?  Avocados are the coolest, right?!


On February 7th between 3:00 and 4:00pm EST there will be an #iloveavocados Twitter party with @guacgrl! Check it out for a good time and for great prizes such as gift cards and Caf̩ Press gift cards to buy I Love Avocados Gear Рover $500 in prizes! Just follow @guacgrl or hashtag #iloveavocados to be a part of the fun!

If that looks good, come back tomorrow.  I'll be sharing a delicious recipe for Baked Nachos that you can use as an excuse to whip up a batch of guacamole.  As if you needed one.  Have a great day, friends!

Visit Sponsor's Site


Related Posts Plugin for WordPress, Blogger...